
Elastic Beanstalk is the AWS platform-as-a-service that helps you deploy your code with ease. As a platform-as-a-service, it means that you do not have to worry about server setups and resource provisioning required to run your code. Elastic BeanStalk says, "Hey give me your code and I will let the world see the magic you've made in a couple of minutes".
It sounds pretty easy right? Yeah, it does. But sometimes it is not as straight-forward as it sounds to get your app to return the green status. In this article, I'll be showing you how to deploy your Node.js API using the Elastic Beanstalk CLI and the tips to troubleshooting it if the status returns degraded after deployment.
PS: You can also deploy on Elastic Beanstalk using the AWS console interface, we are only focusing on achieving the same using the CLI
Requirements
Next up, you need to create an access key for the AWS IAM user you want to authenticate with. If you already have an access key, you can skip this steps. To generate an access key, follow the steps below:
- On your AWS console, click on the Services and select IAM.
- Click on Users, if you already have a user, then click on the user you want to use and click Create access key.
Now, you are ready to deploy your app on Elastic Beanstalk.
Step 1 - Initialize Elastic Beanstalk
Open your project in a terminal and cd to the root directory. Verify that EB CLI has installed by running the command:
$ eb --version
 // EB CLI 3.18.1 (Python 3.8.2)
To initialize EB, run:
$ eb initThings to note when responding to the prompts of eb init
- For Select a default region, make sure you select the same region where the access key is generated You'll be prompted to authenticate your account, use the access key you created earlier.
- For the prompt Do you wish to continue with CodeCommit?, choose N, except you want to use CodeCommit, choosing N will force it to use the GIT repository
- Do you want to set up SSH for your instances? (Y/n), choose Y if you want to be able to ssh into the Elastic Beanstalk's EC2 instance Select a keypair.You'll have the option to select an existing keypair or create a new one.
Now, you should have a .elasticbeanstalk folder created which will contain the deployment configurations for your application.
Step 2 - Advanced environment customization with configuration files (.ebextensions)
Here you'll specify the environmental variables that your application needs to run. You can also specify commands that should run immediately the application starts, for example run migrations, etc. Check the docs for more details of the different types of commands you can specify using .ebextensions
In the project I used in this article, I want to set some environment variables such as NODE_ENV, DATABASE_URL, JWT_SECRET. I also want to run migrations for the database. To achieve that, I followed the steps below:
- Create
.ebextensionsfolder at the root of the project -
Create a file named options.config inside the
.ebextensionsfolder Theoptions.configlooks like shown below:option_settings: aws:elasticbeanstalk:application:environment: NODE_ENV: production DATABASE_URL: postgres://my-database-url JWT_SECRET: my-secret container_commands: 01_migrations: env: NODE_ENV: production command: "npm run migrate"Notice that I am using a postgres database in this example, in your own case it can be anything according to your use case. The
.ebextensionsfiles must have the extension.configfor it to work
Note: If you are using GIT as the source control, you must push the .ebextensions to GIT for EB CLI to recognize it. But what if the .ebextensions contain sensitive data?
To solve this problem, you'll need to override GIT so that EB uploads the files directly from your local machine instead of GIT repository.
Follow the steps below:
Create a .ebignore file
Copy the content of .gitignore into .ebignore
That is it, when EB CLI detects the presence of .ebignore, it'll not use GIT as source control, rather it will deploy directly from your local machine by bundling everything that is not in the .ebignore. That way you can keep .ebextensions in the .gitignore to avoid exposing sensitive data.
Step 3 - Create the application environment (Deployment)
To create the Elastic beanstalk environment for the application and deploy it, run
$ eb create <environment-name>The <environment-name> is the name of your application, in this example I used demo hence the command is eb create demo.
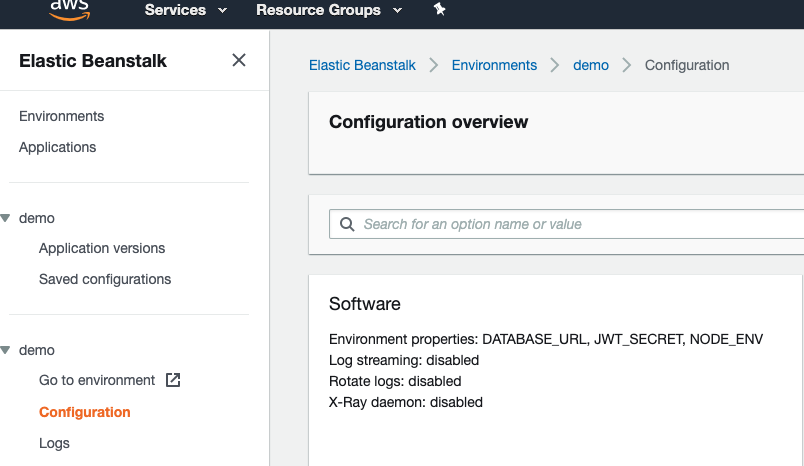
Once the environment creating starts, visit your AWS console and navigate to Elastic Beanstalk, you'd notice that the resources needed to deploy your application is being provisioned. You'll also notice that the environment variables that were specified in the .ebextensions/options.config have been added to the Sotware configuration as can be seen in the screenshot below:
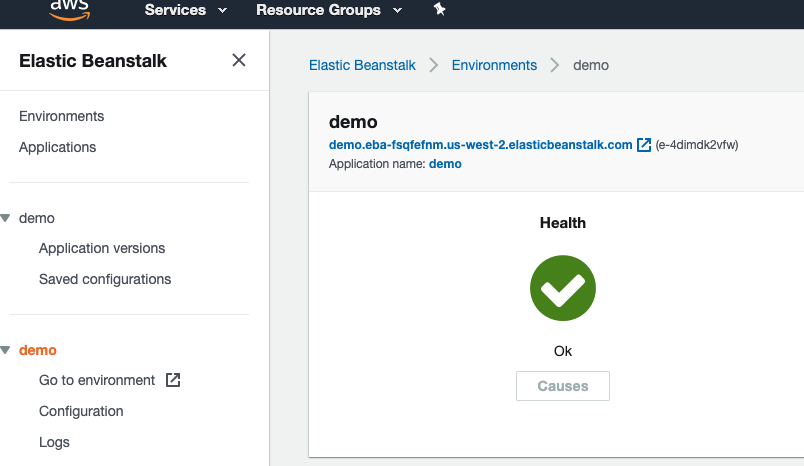
The screenshot below shows a successful deployment of the application:
Now that the application has successfully deployed, let's look at some operations that you may likely need to perform on your EB EC2 isntance.
ssh into the EC2 instance
To ssh into the EB EC2 instance, run
$ eb ssh <environment_name>To navigate to the location of the application files, run
$ cd /var/app/currentYou can also run any commands such as migrations, etc as you need inside the application as usual.
Debugging
Sometimes, the application status will transition to degraded or severe, whatever it is, provided it's not green, it means there might be some problems that you need to fix. You can view the logs by running:
$ eb logsDeploying an update If you need to deploy an update to the application, run
$ eb deploySetting environment variables If you want to set an environment variable using the CLI, run
$ eb setenv [VAR_NAME=VALUE]For more commands, run
$ eb --helpConclusion
We've walked through how to deploy Node.js API on Elastic Beanstalk using the CLI. Though everything done in this article can be achieved from the console dashboard. The only exception is running commands inside the application which can be achieved via ssh.
If you have got any questions don't hesitate to reach out. You feedback and contributions are greatly appreciated.